June 6, 2026 • Maren Solvik • 9 min reading time • Specs verified June 11, 2026
Seed Starting Trays for Kitchen Gardeners: Cell Count, Dome Height, and When Self-Watering Actually Helps
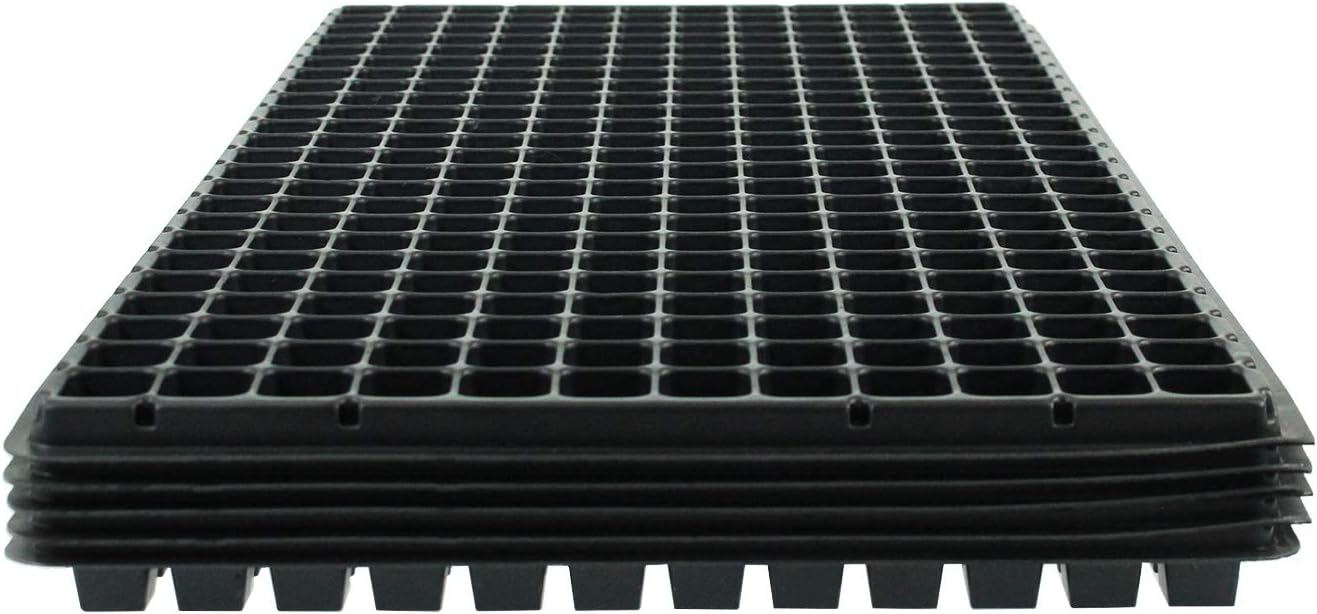
A seed-starting tray is exactly what it sounds like — a plastic or foam tray divided into individual compartments called cells, each one holding a small amount of growing medium so a single seed can germinate and develop roots before it gets transplanted into the garden. Every cell is essentially a tiny pot, and the size, depth, and number of those cells shapes how fast your seedlings grow, how often you need to water, and whether the whole system fits the light shelf or windowsill you’re working with. If you’ve ever watched a flat of tomato starts get leggy in a week or had lettuce damp off before it hit true leaves, there’s a good chance the tray choice — not the seed, not the mix — was the lever you didn’t know you could pull. This guide walks through the three decisions that matter most: cell count, dome height, and whether a self-watering reservoir is worth the step up in cost.
Cell Count: Match the Tray to the Crop, Not to the Shelf Space
The most common mistake with seed-starting trays is treating cell count as a storage question — “how many plants can I cram in?” — rather than a crop-biology question. The two most popular standard footprints in North America are the 1020 flat (roughly 10 inches × 20 inches), which fits standard heat mats and dome lids, and a half-flat that suits tighter light shelves. Within the 1020 footprint, inserts range from 18 cells up through 288 cells, and those numbers carry real biological consequences.
Larger cells (18, 32, 50 count) mean more cubic volume per plant. A 50-cell tray typically yields a cell volume of roughly 1.5 to 2.5 cubic inches. A 288-cell plug tray compresses that to under 0.2 cubic inches. For crops like tomatoes, peppers, eggplant, and winter squash — plants that need three to eight weeks of indoor growing time before transplant — smaller cell counts protect you from the main failure mode: root-bound seedlings. When roots circle the cell wall and have nowhere to go, the plant stalls, and no amount of watering recovers the lost growing momentum. University of Minnesota Extension’s guide on starting seeds indoors specifically cautions that transplants held too long in undersized cells develop stunted root systems that underperform in the field even after transplanting.
Smaller cells (128, 200, 288 count) are not inferior — they’re crop-specific. Johnny’s Selected Seeds’ transplant production guide frames it cleanly: plug trays in the 128–288 range are the correct tool for short-cycle crops like lettuce, onion, and leek starts, basil plugs destined for potting on within two to three weeks, and flowers like celosia or snapdragons that move to the field quickly. For these crops, smaller cell volume actually encourages the fibrous root mat you want for clean plug-pull and fast establishment. ATTRA’s overview of plug and transplant production for organic systems reinforces this point, noting that matching cell volume to planned transplant timing is the single most controllable variable in plug quality.
By the Numbers: Cell Volume vs. Crop Hold Time
| Insert | Approx. cell volume | Best hold time | Crop fit |
|---|---|---|---|
| 18-cell | 8–12 cu in | 8–12 weeks | Tomato, pepper, eggplant |
| 50-cell | 2.5–3.5 cu in | 4–8 weeks | Brassicas, cucumbers, squash |
| 128-cell | 0.8–1.2 cu in | 2–4 weeks | Lettuce, leeks, basil |
| 288-cell | 0.15–0.25 cu in | 1–2 weeks | Onion plugs, microgreen starts |
Volumes are approximate manufacturer ranges compiled from published spec sheets; individual tray brands vary.
The practical decision rule: if you’re starting a crop that will spend more than four weeks under lights before going out, default to a 50-cell or larger insert. If you’re running a succession system where plugs move to soil blocks or larger containers within three weeks, 128-cell trays give you more plants per flat and are easier to water uniformly at scale. Growing for Market’s field-production coverage consistently reinforces this succession logic for kitchen gardeners who want to run continuous harvests without tying up light-shelf space.
Dome Height: The Variable Almost Nobody Reads on the Label
Standard dome lids come in two common heights: a low-profile dome at roughly 1.5 to 2 inches, and a tall dome at 6 to 7 inches. A third category — adjustable-vent domes — splits the difference with sliding vents but keeps the same tall-profile clearance. Most beginner advice says “put the dome on to hold humidity until germination.” That’s correct, but it misses the follow-on question: what happens after germination?
Low domes are germination-only tools. They hold humidity and warmth during the critical 48-to-96-hour germination window for fast crops, but once a seedling straightens and the cotyledons (the first pair of seed leaves, which emerge before true leaves) open, a 1.5-inch dome is already in contact with or restricting the plant. Low domes work well for microgreens, where you’re harvesting before height matters, and for mass germination of small-seeded crops like lettuce or basil where you’re watching for radicle emergence and then removing the dome immediately.
Tall domes extend your flexibility window significantly. A 6-to-7-inch dome gives tomato, pepper, and herb seedlings room to develop their first true leaf set before you need to act — useful when your schedule doesn’t allow daily monitoring. Fine Gardening’s seed-starting essentials coverage notes that tall domes also let growers maintain elevated humidity during the hardening-on (gradual acclimation to outdoor conditions) period by partially venting the dome rather than removing it abruptly.
The tradeoff is physical: tall domes don’t stack, and on a crowded light shelf every vertical inch is a spacing decision. If you’re running three or four shelves with adjustable light fixtures, a 6-inch dome on the bottom shelf can force your light bar higher than your T5 or LED fixture’s sweet spot — reviewers on horticultural forums consistently cite this collision between dome height and lamp distance as the first thing they’d optimize in a second-generation setup.
Vented domes deserve a specific mention because they’re often marketed as the premium option but are only meaningfully better in one scenario: crops that benefit from gradual humidity reduction over several days rather than an abrupt dome-off moment. Basil, which is famously sensitive to cold shock and humidity swings, is the canonical example. University of California Cooperative Extension’s transplant production guidance identifies humidity management during the first week post-germination as a significant variable in basil seedling quality.
Decision rule: if you’re starting tomatoes, peppers, or any crop with a two-plus-week indoor run, buy at least one set of tall domes. Low-profile domes work fine as a supplement for microgreens or fast-germinating salad crops that come off the dome within days.
Self-Watering Reservoirs: When the Math Justifies the Step Up
Self-watering seed trays — also called capillary or sub-irrigation trays — add a water reservoir beneath the cell insert. The insert sits on a wicking mat or directly over perforated channels, and water moves upward through capillary action (the same force that pulls liquid up a paper towel) rather than being applied from above with a watering can. The result is more consistent moisture at the root zone, less surface disturbance of germinating seeds, and fewer cycles of wet-then-dry stress that crack tender stems or encourage damping off (the fungal collapse of seedlings at soil level).
The honest cost calculus: a standard 1020 flat and insert runs roughly $2–$5 per unit at wholesale quantities. A quality self-watering system from suppliers like Gardener’s Supply or the Ladbrooke Rootrainer line runs $20–$45 per unit. That’s a 6x to 15x step up in per-tray cost. For a kitchen gardener starting 10–15 trays of tomatoes and peppers once a year, the payback is qualitative — fewer lost seedlings, less daily attention. For a market grower running 200-plus trays in a propagation house, the math shifts toward labor: sub-irrigation trays reduce watering passes and allow longer unattended windows, which Growing for Market’s commercial production reporting identifies as a meaningful labor reduction in busy spring propagation seasons.
Where self-watering trays genuinely earn their cost:
- Slow-germinating crops (parsley, carrots, celery) that need sustained, even moisture for 14–21 days without surface crusting
- Grow-light setups with HID or high-intensity LEDs that dry out the surface quickly, making top-watering a twice-daily task
- Anyone watering early-stage plugs alone — the reservoir acts as a buffer against a missed day
- Heat-mat setups, where bottom heat accelerates moisture loss and top-watering frequency climbs
Where standard trays are perfectly sufficient:
- Crops you’re germinating in 5–7 days and transplanting within two weeks
- Growers who mist or bottom-water (setting trays briefly in a shallow pan of water) already — manual bottom-watering captures 80% of the benefit at zero added cost
- Beginner setups where the priority is learning crop timing before investing in system infrastructure
ATTRA’s plug production overview makes a useful framing distinction: sub-irrigation is most defensible as a labor tool rather than a yield tool. Germination rates between well-managed top-watered and sub-irrigated trays are similar when the grower is attentive. The reservoir’s real value is compressing the attention requirement, not magically improving germination biology.
Putting It Together: The Decision Frame
If you’re building or upgrading a seed-starting system right now, the sequence that wastes the least money is:
-
Nail cell count first. Identify your three or four highest-volume crops, look up their typical days-to-transplant, and buy inserts that match that timeline. A 50-cell and a 128-cell insert cover the majority of kitchen-garden scenarios.
-
Buy tall domes if you’re growing tomatoes, peppers, or herbs. Low domes are fine as a second set for microgreens and fast salad crops. Don’t assume the dome that came with your kit is the right height for everything.
-
Add sub-irrigation only after you’ve identified a specific friction point — repeated missed waterings, surface drying on a strong LED setup, or a crop like parsley that’s genuinely difficult to keep evenly moist. Starting with manual bottom-watering (pan method) first costs nothing and teaches you whether the added system complexity is actually solving a problem you have.
The underlying principle that Fine Gardening and the extension-service resources all circle back to: seed-starting trays are not interchangeable commodity plastic. They’re matched tools. The grower who spends ten minutes checking cell volume against crop hold time and dome height against light-shelf clearance before buying will spend far less time rescuing leggy, root-bound, or damped-off starts once the season is underway.